Tutorial: How to Create a Fade In
Leave a reply

Premiere Pro has a lot of interesting features to edit video clips with. One of those features is the Speed and Duration setting that you can use to play around with the speed, duration, and direction of your clip. Here is a tutorial on how to use this setting to reverse the direction of your clip so that it plays from end to beginning instead of beginning to end.
Step 1. After opening your project in Premiere Pro and importing the video you wish to change the direction of into your project, left-click on the blue box next to the clip file’s name so that it opens in the editing section of Premiere (the Source box). As an example, I will showing how I changed the direction of the robot legs clip.

Step 2. Next, direct all your focus onto the editing box where the clip you wish to edit is now selected. Using your mouse, right-click on the video clip preview.

Step 3. This will open a long dialogue box. Find the option called “Speed/Duration” and left-click on it.

Step 4. The Speed/Duration settings box will then pop-up and prompt you to make changes to the clip.

Step 5. Lastly, check the box that says “Reverse Speed” and then click “OK”. Now your clip should play backwards.

Premiere Tutorial: Adding video transitions
For my tutorial, I’m going to show you how to add video transitions between video clips in Premiere. It’s really not that difficult, but it was something that didn’t come so easily to me at first when I was doing it, so I thought I would share this trick.
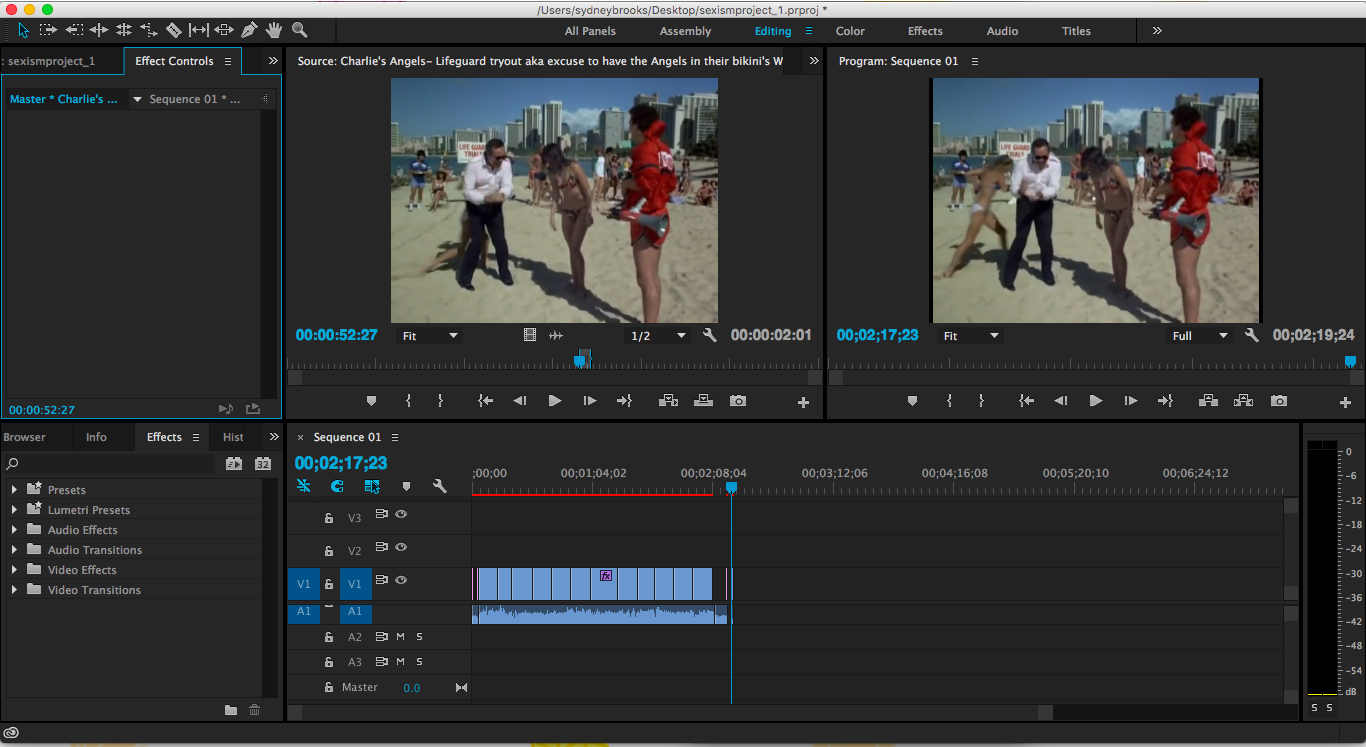
1) Click on the Effect Panel near the top of the screen. It should open up an Effects panel somewhere on your screen. In the screenshot below, the Effects panel opens up to the left of the screen.

You can see in the Effects Panel that there are a variety of video and audio effects. I have the video transitions tab lengthened, so you can see all of the different types of video transitions.
2) I’ve selected the dissolve tab to pick the transition I want that includes a dissolve of some type. As you can see in the screenshot below, there’s a variety of different transitions you can choose from this dissolve tab. I’ve selected the Dip to Black transition in this screenshot.

After selecting the transition you want and setting up the video clips you want to place the transition between, all you have to do is drag the transition you selected from the Effects Panel and drop the transition between the to video clips. In the screenshot above, I’ve just dropped a transition between two clips towards the right hand side of the timeline.
3) After dropping the transition effect on the timeline, it should look like the transitions on the timeline in the screenshot below. From here, you should be able to manipulate the transition. You can elongate the transition with the select tool or you can alter the transition’s starting point.

This video shows how to efficiently switch between clips, but keep your audio going if you want to have a monologue or song overlay different clips. The purpose of this method is to keep your clips in order so that if you need to make changes to ordering or timing you do not lose the clips and have to start a clip from scratch from a source.

As you would normally, select the segment of the clip you want using the brackets ( { } ) and insert the clip into your sequence using the insert button (six buttons over from the right bracket button).
Once the clip has been imported, go to the upper left and click on the “Effect Controls” tab. This tab is to the left of the tab that holds all of your imported clips. If there is no “Effect Controls” tab, go to the top of your screen and click “Window” and then “Effect Controls”.

The “Effect Controls” box should be empty. Select the clip within your sequence that you wish to make black and white. A list of already implemented audio and video effects will appear.

Go to the bottom left of your screen to the “Effects” box where different effect options are listed. Click on “Video Effects”.

Under “Video Effects” is a long list of various effects. Click on “Color Correction”. Another list will appear.

Find “Channel Mixer” in the list of effects under “Color Correction”. Drag and drop the title into the above “Effect Controls” box.

Click on “Channel Mixer” within the “Effect Controls” box. A list will appear.

Scroll to the bottom of the list to where it says “Monochr…” (Monochrome). Click on the box to the left of that to check the box, causing the video in your “Program” box (the box that shows your end result in the upper right) to turn black and white.
 If you need to adjust the levels of black, white and gray in the video, scroll back to the top of the “Channel Mixer” list and adjust the various color levels (Red-Red, Red-Green, Red-Blue, etc.). To do that, click and hold on the blue number adjacent to each color level and drag your mouse left or right to adjust the levels.

Click to view tutorial video on Youtube.com.